A step-by-step guide to how to make and sell an NFT and possibly earn some money for your art.
Want to know how NFTs are manufactured and sold? The ability to turn art into irreplaceable tokens of value is something many artists are exploring as a potential way to sell their work. By establishing secure ownership of the original digital assets, NFTs can enable the sale of art in digital form and provide access to an active new community of interested buyers.
Despite several recent instances of NFT works being stolen or misissued, and marketplaces being hacked, non-fungible tokens are here to stay and are becoming increasingly important to artists. Galleries are starting to feature real NFT collections
Substantially non-fungible means non-fungible or unique. Non-fungible tokens (NFTs) provide a way to prove ownership of an original file or item by creating a digital registry on the blockchain, allowing digital items that are otherwise easily copied. Make it scarce and make it valuable. Digital art NFTs are the most common term we hear, but NFTs can be anything of any kind, from video to music to real estate.
Before you learn how to make and sell an NFT, it's important to be clear about what they are, so you might want to read our explainer, what are NFTs? We also have guides to NFT drops and how to spot a fake NFT. You'll also find answers to some of the most common questions in the FAQ section at the bottom of this article.
How to make and sell an NFT: a word of caution
Many artists have learned how to create and sell NFTs through high-profile sales by artists like Beeple, who famously sold The First 5000 Days NFT for $69 million. Such staggering numbers represent a small fraction of NFT sales. One difference is that NFTs allow digital artists to earn royalties on all future sales whenever the NFT changes ownership. This can be coded into the original smart contract.
The other important thing to be aware of from the outset is that there are a lot of fees involved in generating, maintaining and selling an NFT. While some NFT marketplaces now support fee-free NFT minting, with the cost placed on the buyer, the creator has to pay for minting the NFT in most cases, whether they sell it or not. See our tutorial on how to create an NFT for free for specific details on that.
Although the NFT market has been a little slow this year, there are still plenty of artists, illustrators, and designers making money off the sale of NFTs. Nonfungible.com (opens in new tab) reports that from his $67 million last year, Ethereum's primary and secondary sales for his blockchain in 2021 will surpass his $15 billion. So if that sounds like the way to go, let's dive into the basics of creating and selling NFTs. Below, we'll walk you through the process step-by-step, covering NFT marketplaces, NFT cryptos, and what you need to know. Let's take a closer look at everything else there is.
How to make and sell an NFT
The first thing you need to do to create and sell an NFT is to "cast" it (assuming you already have artwork that you want to convert to NFT). To create his NFT of artwork, you need to choose an NFT platform and a payment wallet. The latter is needed to pay the fees of the former and, fortunately, receive payment if he sells NFTs. To illustrate the process, I'm using Rarible as his NFT platform and MetaMask as my payment wallet, but there are many other options - I'll list some in the question section below.
01. Choose a digital wallet
To create and sell NFTs, you need cryptocurrency. Most NFT auction platforms require an upfront payment to “mint” NFTs. This is the process of turning artwork into a sellable, non-fungible token. The cryptocurrency Ether (abbreviated as ETH) is the most widely accepted payment method as it is the native cryptocurrency of the open-source blockchain platform Ethereum, where NFTs were first introduced.
Some platforms have started accepting different forms of payment, using different blockchains to create NFTs, and some are better for the environment. Check out our guide to NFT ciphers to learn which one is best for you.
If you already own ETH, you'll need to make sure it's in a digital wallet that needs to be connected to your chosen NFT platform in order to make (and receive) payments. If you don't have the currency, there are many cryptocurrency exchanges where you can buy ETH, but usually the quickest and easiest option is to buy it directly using your digital wallet of choice.
There are many well-known NFT payment platforms such as Coinbase, MetaMask, Torus, Portis, WalletConnect, MyEtherWallet and Fortmatic. I'll use MetaMask (opens in new tab) for illustration, but you can consider the platforms above and others. In most cases the process is similar. Before making a decision, we recommend that you review the applicable charges in as much detail as possible (charges are discussed below).
If you prefer to use another service, or if you already have a digital wallet and know how it works, jump straight to step 4. Otherwise, we'll talk you through how to set up your wallet and buy ETH in the next step.
02. Set up a digital wallet to pay for your NFT
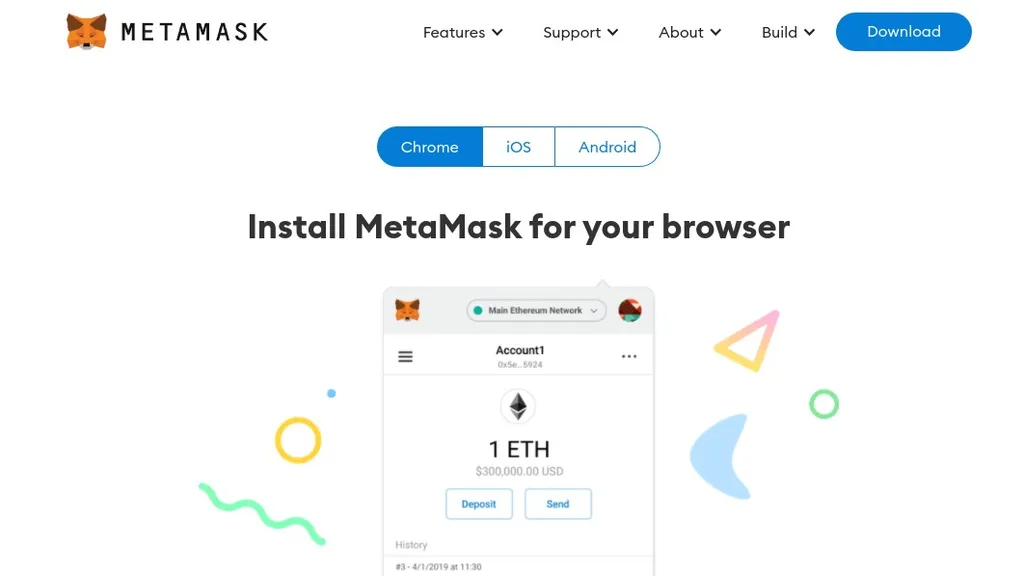
To create a digital wallet in order to be able to pay an NFT platform to make and sell an NFT, you'll need to go MetaMask's website and click on the blue ‘Download’ button in the top-right. As we’re using a desktop computer, we'll choose the option to install the browser extension, but there's also a mobile app.
You'll be asked to confirm that you wish to ‘create a new wallet and seed phrase’. Don't worry too much about what ‘seed phrase’ means (it’s basically a list of words that stores blockchain information). Say yes, then it’s simply a matter of agreeing to the terms, creating a password, and making your way through some security measures, then you’ll have your account set up.
03. Add cryptocurrency to your wallet
After setting up your MetaMask wallet or any other digital wallet, you need to add ETH. If you don't have ETH yet, you need to buy it now, so click the Buy button and select the Buy ETH with Wyre option.
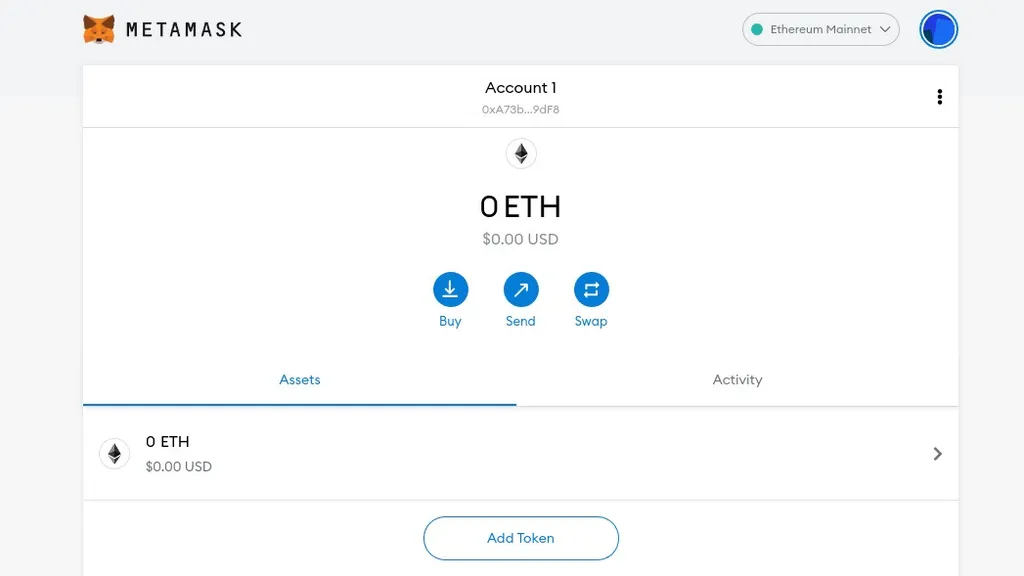
You will be presented with a screen where you can purchase ETH using Apple Pay or a debit card. Note that you can postpone this stage for later if you don't want to part with the money just yet.
The jargon associated with the cryptocurrency world can make this part of learning how to create and sell NFTs quite difficult, but buying the currency is actually pretty easy. However, be aware that like Bitcoin and many other cryptocurrencies, the value of Ether can fluctuate greatly.
In 2021 alone, the price of 1 ETH has risen from his under $1,000 to around $4,700 at the time of writing, with many ups and downs along the way. It is quite possible that the price of a currency can fluctuate by hundreds of dollars in just a few hours.
04. Connect your wallet to an NFT platform
Most digital wallets work in a similar fashion. Regardless of which you choose, you will need to connect to the NFT platform you use to sell your NFTs. We will use Rarible for illustration purposes, but there are many other NFT platforms to choose from and the process is generally similar to what is outlined below.
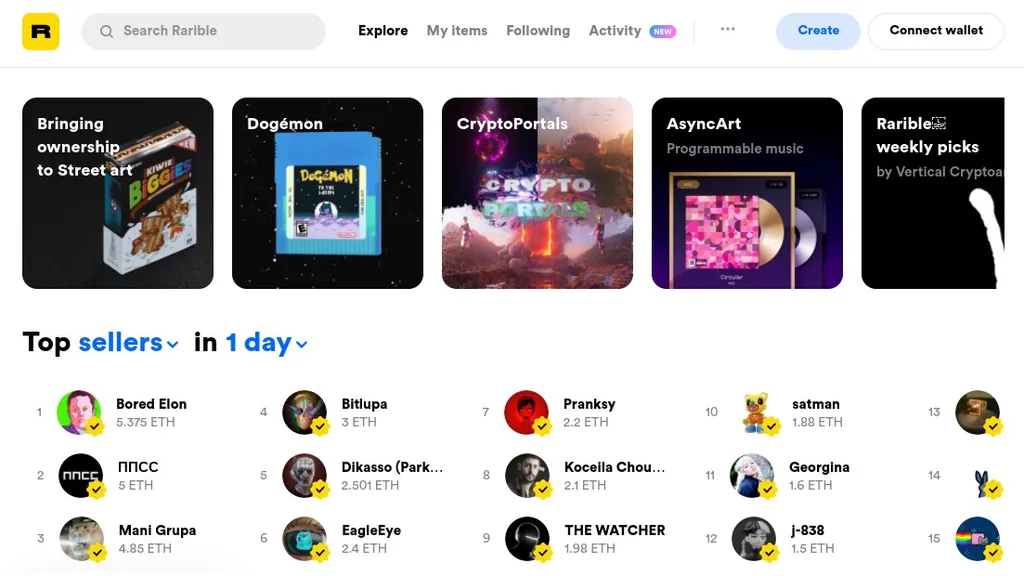
Go to Rarible.com (see above). In the right corner of the screen there is a button called "Connect wallet". Click there and the next screen will ask for a wallet provider (in this case MetaMask). A popup will give you the option to connect your wallet to Rarible. Click Next, Connect, agree to the Terms of Service, and confirm that you are at least 13 years of age.
05. Upload the file you want to turn into an NFT
You now have a wallet connected to ETH for payments and are ready to create and sell NFTs. On his website on Rarible, click the blue Create button in the top right corner. You can then choose to create a single his one-off creation or sell the same item multiple times.
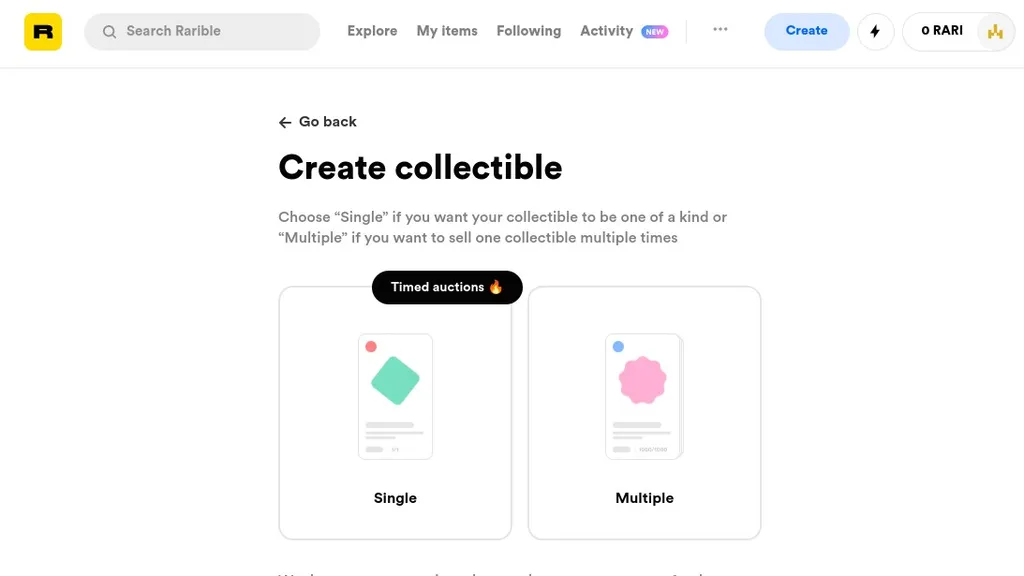
For this example, select Single. Next, you need to upload the digital file that you want to convert to NFT. Rarible accepts PNG, GIF, WEBP, MP4 and MP3 files up to 30MB.
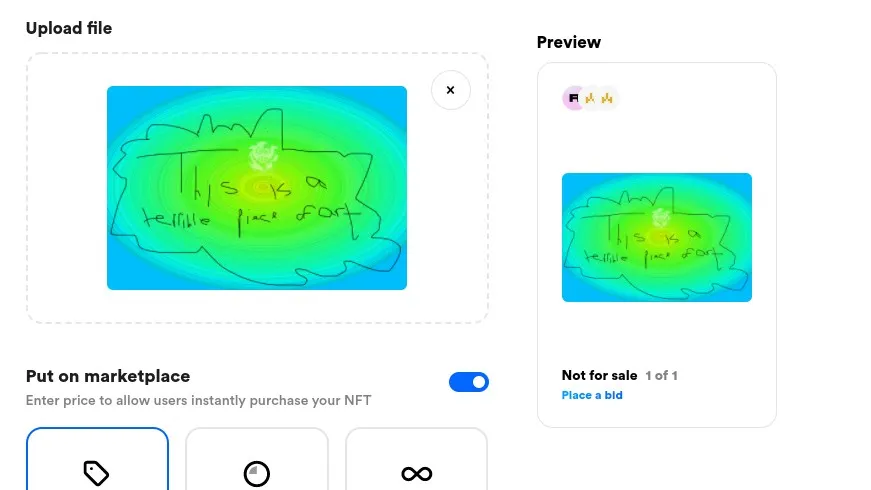
To illustrate, I've created an ironically terrifying work of art inspired by the controversial David Hockney London Underground art. You'll see a preview of what the will look like.
06. Set up an auction for your NFT
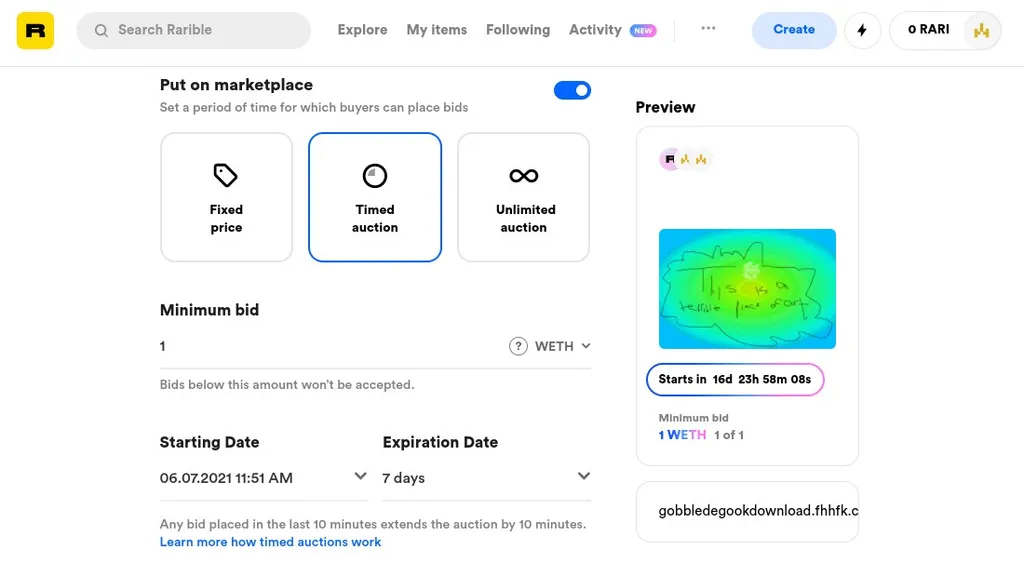
The next part of the form requires you to choose how you want to sell your NFT artwork. You have three options. “Fixed Price” allows you to set a price and sell your NFTs instantly (similar to eBay's “Buy Now” option). The "Unlimited Auction" option allows you to continue bidding until you accept. Finally, a "timed auction" is an auction that lasts for a fixed amount of time. This is the option I chose as an example.
This brings us to the hardest part: choosing a reservation price. If you sell NFTs too cheaply, huge fees can eat up your profits and even charge you out-of-pocket. We will set the price at an ambitious 1 ETH (currently $4,700) with a 7-day bidding period.
Then you will see an option to "Unlock when purchased". This gives the ultimate purchaser the opportunity to provide the full high resolution version of the art and/or additional material via his secret website or download link. Beneath that is the most confusing option titled "Choose Collection". This is a very technical question about building a blockchain. The default option here is 'Rarible' and it is recommended to leave it as is.
07. Add a description to sell your NFT
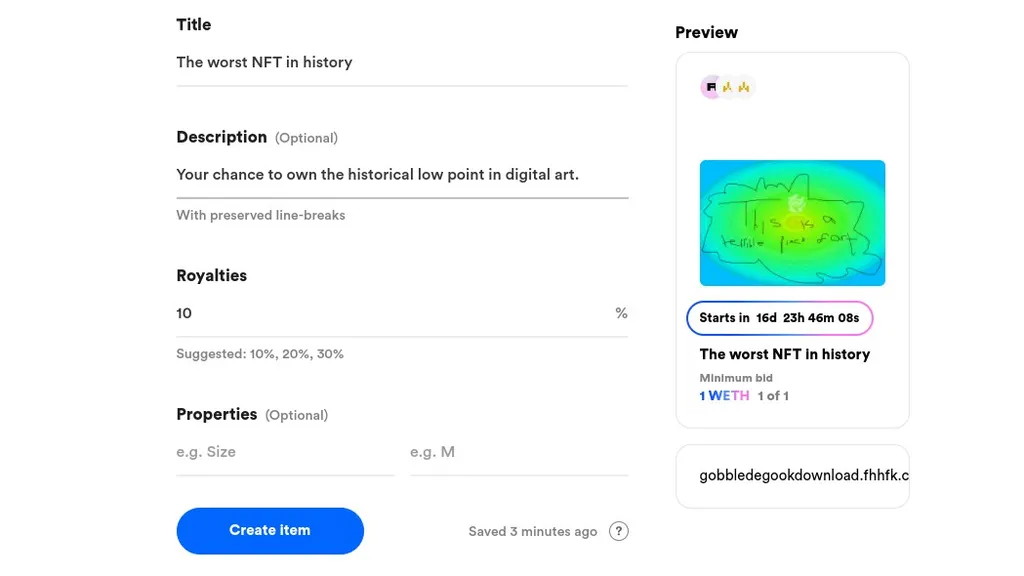
You can now add a title and description for your list. To maximize the chances of an NFT being sold, we need to spend some time thinking about it. You will then be asked to consider the percentage of royalties you would like to collect to resell your art in the future.
Again, this is a balancing act as the higher the percentage, the more revenue per sale you'll make in the long run, but the less likely you are to make a profit, which is why people resell your art in the first place. Finally, there is an optional field to add file properties. You are almost done.
08. Pay the listing fee to sell your NFT
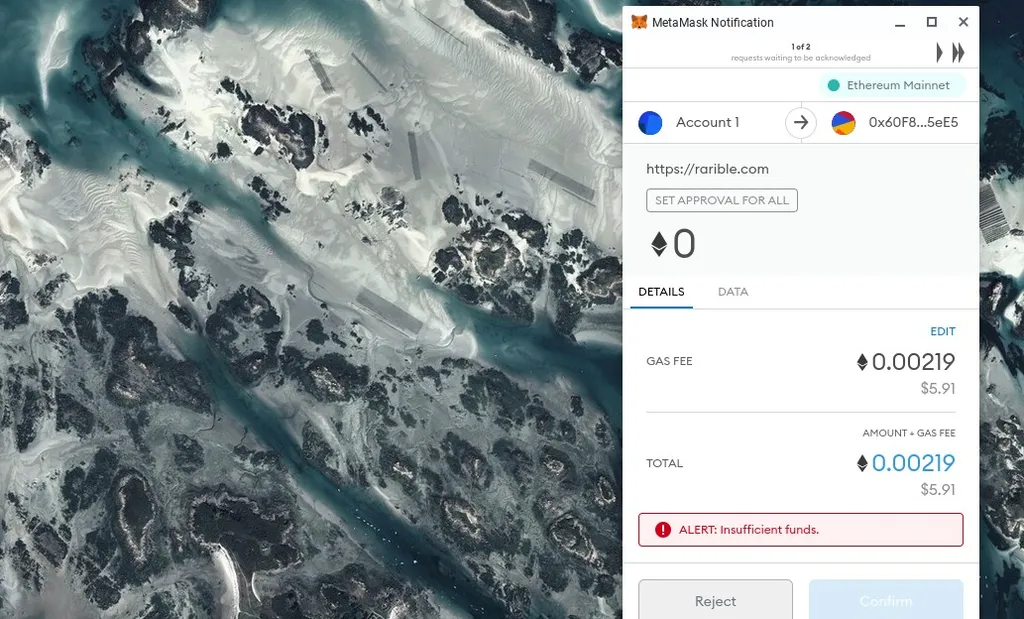
The final step in learning how to create and sell NFTs is to click Create Item. You will be asked to connect to your wallet and pay the listing fee. If you don't have enough funds in your wallet, don't worry. No need to start over. Simply click on the wallet icon in the top right corner of the screen and you will be given the option to add funds directly to Rarible.
Before that, a final warning. Listing fees may seem low. In our case it was only $5.91 USD. But that's just the beginning. Before we can proceed, he actually has to agree to an extra charge for generating the NFT. In this case, this equates to $42.99 in ETH.
When someone actually buys your girlfriend's NFT, they have to pay a fee for the NFT sale and a transaction fee for transferring money from the buyer's wallet to theirs. None of these were clear in our opinion when we tried it on his website on Rarible.
I'd like to be able to clearly and simply explain how the potential costs of creating and selling NFTs are calculated, but I'm not sure if the confusing nature of blockchain technology, the volatility of cryptocurrency values, the platform itself, etc. Its an impossible task due to lack of transparency.
You have to take a risk and see how much you will be charged in total when you make a sale and still make a profit. However, if you want to take a punt and put some money into making NFT art, good luck.
0 Comments